Wednesday, August 31, 2011

Peach Butter lovliness

Peach Butter

Oh how I long for the August farmers market and the fresh peaches.  When the bounty is ripe, juicy, and succulent I venture into Peach Butterdom.  After being inspired by a Smitten Kitchen recipe for Peach Butter I knew which direction to take this obsession with peaches.   Deb's Smitten Kitchen rocks it in the kitchen and I am often inspired by her creations.  I followed her recipe, however it seemed it took hours for mine to get to the right thickness.  My good friend Dena was here on this day.  She was good moral support, encouraging me not to take it off too soon.  I get a little inpatient.  Grin.  I will be enjoying the fruits of this labor in the cold winter months.  It will remind me how much I long for summer and how grateful I am to be reminded of the sweet, sunny summer.  Slather it on your toast, french toast or if you are like me...grab a spoon.  Life's short, have fun.

Ingredients:
  • 4 pounds peaches
  • 1 cup water
  • 2 cups sugar
  • Juice of one lemon
Directions:
Beauty
  • If you don't have a food mill: Cut a small x  in the bottom of each peach (this will make it easier to remove the skin). Put peaches in a  pot of boiling water for 30 seconds, and then into a bowl of cold water for a bit (minute or two or three). The peels should slide right off. If you have a food mill you won't have to peel the peaches and can skip this step, yeah for the food mill!!!
  • Remove pits and quarter peaches. Put peaches water in a heavy pot and bring to a boil. Simmer until peaches are tender, about 15 to 20 minutes. Stir occasionally. Smell your kitchen and absorb this loveliness with all of your senses.
  • If you have a food mill, run them through it to puree them and remove the skins. If you don’t have a food mill puree them in a food processor or blender.
  • Return the peaches to the pot, add the sugar and lemon juice and bring the mixture to a gentle boil, cooking them at this level for 2 hours (if you can get it thick in less time than that, without scorching it...more power to you.)
  • It is done when it is thick enough to hold its shape on a spoon but you can make it as thick or thin as you want.
  • Fresh Peaches
  • To can your peach butter: sterilize your jars, either by boiling them in a large, deep pot of water (which should cover the jars completely) for 10 minutes or washing them really good, then put the jars only in a 200 degree oven for 20 minutes. Pour the piping hot peach butter into the hot jars but be sure to leave a little room at the top of the jar. Clean up edges and wipe the rims clean with a dry towel and cover jars with lids. Submerge the jars in a large,  pot of boiling water for 10 minutes. Let cool completely on towels.

Getting ready to dip an apple wednge in my first batch...

Tuesday, August 30, 2011

Sweet Corn

Farmers Market Sweet Corn

Klosters have spent August freezing sweet corn for as long as I can remember.  This labor of corn shucking love is a long standing tradition.  Honestly, there is nothing like fresh home grown corn.  Freezing a bunch for a mid-winter pick me up is brilliant! This year I shucked (ahhh...actually Erick did the shucking), cooked, cut, bagged and froze 7 dozen cobs of corn.  I will spend my winter in a corn heaven...spoken like a sick mid western gal.  If you do this you will be so happy that you did, trust me.

Fresh, Frozen, Sweet Corn
This will brighten anyones February
Ingredients:
  • Farmers Market Fresh Corn
  • Boiling water
  • Ice Water
Directions:
  • Boil water
  • Add corn and cook 3 minutes
  • Remove corn from water
  • Drop in ice water for 3 minutes (this helps retain the beautiful color and texture)
  • Drain from ice water and set aside
  • Cut corn from cob, make sure you don't cut into the cob, the fibery stuff is a no go.
  • Scrape Cob with back of blade to get all the milky sweet goodness
  • Portion in small zip lock bags, squeeze air out of bag and freeze
  • Enjoy through the winter

Monday, August 29, 2011

Garlicky Hummus

Garlicky Hummus

Today Dena and Elizabeth joined me for lunch.  It was a special treat.  I was excited to see and spend time with them during the week, especially since I am usually working non-stop during the week. Hummus can be so satisfying and it only takes 20 minutes or less to prepare.  I must admit, having warmed Pita bread is the secret to putting this over the top.  I prefer to heat my pita on a skillet on the range.  This Hummus is nice and garlicky.  If you have an aversion to garlic you can reduce or omit the garlic.  Serve this Hummus with some feta cheese, Kalamata olives, Greek salad and warmed pita and you have a hearty and satisfying meal. 


Hummus pureed in food processor

Garlicky Hummus

Ingredients:
  • 4 garlic cloves (use 2 cloves if you like a more subtle garlic flavor)
  • 2 cups canned chickpeas, drained, liquid reserved
  • 1 teaspoons kosher salt
  • 1/3 cup tahini (sesame paste)
  • 6 tablespoons freshly squeezed lemon juice (2 lemons)
  • 1 tablespoons water or liquid from the chickpeas
  • 1 tablespoon olive oil
  • 8 dashes hot sauce
Directions:
  • Turn on the food processor fitted with the steel blade and drop the garlic down the feed tube; process until it's minced.
  • Add the rest of the ingredients to the food processor and process until the hummus is coarsely pureed.
  • Taste, for seasoning, and serve chilled or at room temperature with warmed pita and Greek salad.

Hummus with Greek Salad, Feta, Kalamata Olives, and Pita

Sunday, August 28, 2011

Greek Salad


Greek Salad

Greek Salad reminds me of my friend Tammy.  She taught me how to enjoy and make a Greek Salad.  Over the years, she and I have enjoyed many variations of this treat.  It is fresh, crunchy and has a hint of salt from both the feta and the Kalamata Olives.  This would be good with a piece of grilled chicken.  I like to serve it with warm pita bread.  Go crazy! 

Greek Salad

Ingredients:
  • 1 pound tomatoes, cored, seeded and chopped
  • 1 English cucumber, peeled, de-seeded and chopped
  • 1 tablespoon red onion, finely chopped
  • 1/2 teaspoon Greek seasoning (Penzeys)
  • 1/8 teaspoon fresh oregano, chopped
  • 3 tablespoons olive oil
  • 1 tablespoons red wine vinegar
  • 1/2 cup Kalamata Olives
  • 1/2 cup feta cheese (topped as garnish)
Directions:
  • Prep and chop tomatoes, cucumber and onions
  • Mix tomatoes, cucumber, onions with oil, vinegar, seasoning, herbs, olive oil, vinegar and olives
  • Allow flavors to marry in fridge for a couple hours (or serve immediately)
  • Top salad with fresh crumbled feta cheese

Greek Salad with all the fixings

Saturday, August 27, 2011

Beet Salad with Minneola's

Beet Salad with Minneola's

I love fresh beets.  I recently picked up a few at the farmers market.  I love the fresh taste of combining beets with fresh orange flavor.  I prefer Minneola's which are like a large juicy tangerine.  I also think the raspberry vinegar is a perfect compliment to the beets and minneola's.  This Beet Salad with Minneola is just so juicy, flavorful, and delightful.  I know you will love it. 

Beet Salad with Minneola's


Ingredients:
  • 4 beets, roasted, peeled, chopped and cooled
  • 1 Minneola (or orange or tangerine), peeled and chopped
  • Juice of 1 Minneola (or orange or tangerine), about 1/2-3/4 cup of juice
  • 1 tablespoon finely chopped red onion
  • 1 tablespoon Olive Oil
  • 1 1/2 teaspoon Raspberry Vinegar
  • 1/4 Teaspoon Salt
  • 1/4 teaspoon Minneola (orange) zest (optional)
Directions:
  • Wash beets and prick with fork.  Roast in 350 oven for 1 hour or until fork tender.  Cool, peel and chop
  • Peel Minneola and chop
  • Juice Minneola
  • Combine beets, minneola, minneola juice, onion, olive oil, raspberry vinegar and salt
  • Let flavors marry and rest in fridge a couple hours
  • Serve and enjoy!
Beet Salad with Minneola's

Friday, August 26, 2011

Green Chile Pesto

Green Chile Pesto
Years ago my friend Genevieve taught me how to make Green Chile Pesto.  This is adapted from her recipe.  It has the perfect amount of spice and is a great twist on the normal basil pesto.  I found most of the ingredients at my favorite farmers market.  I also like to freeze small containers of this pesto so that I can enjoy these hints of the farmers market throughout the year. 

Roasted Poblano Peppers


Ingredients:
  • 1 Jalapeno, roasted, skinned, seeded and chopped
  • 1 clove garlic
  • 2 cups grated Parmesan
  • 1 1/2 cups green Chile (used canned or roast your own), I used 5-6 fresh P0blano Chile's, roasted and seeded. 
  • 1 cup pecans, chopped and toasted
  • 2 cups cilantro leaves lightly packed and minced
  • 3/4 cup olive oil
  • 1/2 teaspoon salt
  • 1/4 cup fresh lemon juice
Directions:
  • Roast peppers (I used 6 poblano peppers) and jalapenos under broiler until charred and turn until all sides are charred.  Once charred, put in bowl and cover with plastic wrap.  Put covered in fridge for 15-30 minutes.  After cooled and steamed peel off skin and de-seed peppers.  Then chop peppers and set aside
  • Grate Parmesan in food processor
  • Toast pecans in oven
  • Juice 2-3 lemons
  • In a food processor combine, chopped peppers, jalapeno, garlic, Parmesan, pecans, cilantro, olive oil, salt and lemon juice. 
  • Process until mixture is smooth
  • Freeze in 1/2 cup containers
  • Toss green Chile pesto with your favorite pasta sauce, add grilled shrimp or chicken if desired.


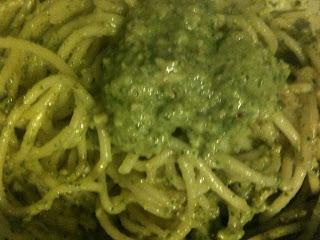
Pasta tossed with Green Chile Pesto


Sunday, August 7, 2011

Susan's Italian Wedding Soup


Italian Wedding Soup

Our friend Susan is an amazing cook. She is so sweet, she even shares her recipes with me.  She gave me her Italian Wedding Soup recipe and I have adapted it slightly.  This is so good and I am forever grateful to Susan for her generous spirit, warm heart and understanding soul.  I made this soup and I had it for dinner nearly every night until it was gone.  It was easy to make and comes together very quickly.  I keep meatballs on hand in the freezer and that helps make this a quick go to meal.

Italian Wedding Soup (adapted from Susan and Homemade in Half the Time)
Ingredients:
  • 2 tablespoons butter
  • 3/4 finely chopped onion
  • 8 cups chicken broth (use homemade broth or if you use Bouillon, use only the Better than Bouillon , brand, use low sodium if you are sensitive to salt)
  • 1 teaspoon fresh ground pepper
  • 1  1/2 cups or 12 ounces cocktail size Italian flavored cooked meatballs each cut in half 
  • 1/2 box cooked pasta
  • 2 cups baby spinach (1 1/2 cups shredded, 1/2 cup finely diced)
  • Parmesan Cheese (for garnish)
  • Parmesan Cheese rind
Directions:
  • In a large pot combine the butter and onion over medium heat for two to three minutes until translucent.
  • Add the reconstituted Better than Bouillon broth and pepper then bring to a boil.
  • Add a left over piece of Parmesan cheese rind and allow to dissolve into soup
  • Cook for about 5 minutes and add meatballs (if you are adding them frozen return the soup to a boil before adding your pasta).
  • Add pasta and gently cook for 3 minutes.  You can use cheese stuffed pasta or simple bow tie.
  • Add spinach and reduce the heat to low. Let it sit on low for another 5 minutes or so.
  • Make sure your stir it very gently. You don't need to add any salt because of the bouillon.
  • You can add more spinach, pasta, or even meatballs depending on what you like, but I think this is a nice combination. 
  • Serve with a real crunchy french bread and cold REAL butter.

Italian Wedding Soup topped with Parmesan

Saturday, August 6, 2011

Lime Blackberry Meringue Pie

Lime Blackberry Meringue Pie

Dena and her daughter Elizabeth just moved back to the Midwest and I am so excited they live in Wisconsin now.  Recently Elizabeth went to Beijing and Seoul.   After her trip we had a welcome home party for her.  During the party Elizabeth shared some of her special Jasmine tea and we had our own tea ceremony.  Before every sip we announced our blessings, wishes and dreams to toast the wonder that the future has to offer each of us.  Elizabeth also shared with us the highlights of her trip including learning how to write and paint words in Chinese.  Some of Elizabeth's favorite foods include Steaks and citrus desserts.  In honor of Elizabeth we cooked up all of her favorites.  For dessert I made this Lime Blackberry Meringue Pie, inspired by this months issue of Bon Appetit.  Since Elizabeth has a dairy allergy I adapted the original recipe and used a dairy free light margarine.  It was amazingly delicious.  Elizabeth told her Mom that she loved it, and that made my heart sing. 


I love the tart sweetness of citrus curd.  It is refreshing in a pie, tart or as a layer in a cake. 


Ingredients:
  • 1 1/2 Cup Fresh Lime Juice strained (about 12 limes)
  • 1 Cup or 2 sticks butter (I used a dairy free light margarine due to a special guest with an allergy)
  • 2 Tablespoons Lime Zest
  • 6 Egg Yolks
  • 4 Eggs
  • 1 3/4 Cup Sugar
Directions:
  • Stir lime juice, butter and lemon zest in large saucepan over medium heat until butter melts
  • In a separate bowl, whisk egg yokes, eggs and sugar until well blended
  • Gradually whisk in hot lime mixture
  • Return mixture to same saucepan and whisk over medium heat until thick and smooth (15 minutes until reaches 175 degrees).  Do not boil. 
  • Strain curd with fine mesh strainer to remove zest so that you have a very smooth curd 
  • Transfer to bowl, cover surface with plastic wrap, to prevent curd from forming a skin. 
  • Refrigerate several hours or overnight
Blackberry Sauce
This Blackberry sauce has made a few appearances on this blog, that is a true testament to the versatility and deliciousness that this sauce brings to any dish.

Ingredients:
  • 1 1/8 Cup or 12 ounces of seedless Blackberry Jam
  • 1/4 Cup Creme de Cassis or Pomegranate Juice
  • 4 1/2 Cups Fresh Blackberries
Directions:
  • Whisk jam in saucepan over medium low heat until melted and smooth
  • Whisk in Cassis or Pomegranate Juice
  • Transfer to large bowl
  • Add berries and toss to coat
  • Chill until cold, 2-8 hours

Meringue
Meringue is so yummy and I enjoy the light sweet creamy texture it offers.  I remember the first time I had meringue.  My Godmother, Heidi, brought me to her Grandpa Doyles farm when I was a little girl.  Heidi's grandparents were known for their Lemon Meringue pie and I can understand why....35+years later I still remember that hot summer day, sitting in their farmhouse south of Farmington and enjoying both the best pie ever and the company of my lovely Godmother and her grandparents. 


Ingredients:
  • 3 large egg whites, room temperature
  • 1 cup sugar
  • 2 tablespoons corn syrup
  • 1/8 teaspoon kosher salt
Directions:
  • If toasting meringue in oven, preheat oven to 450°.  I used a kitchen torch.
  • Beat whites in mixer until soft peaks form. Set aside.
  • Stir sugar, corn syrup, and 1/4 cup water in a medium saucepan over medium-low heat until sugar dissolves.
  • Increase heat to medium-high and boil without stirring, occasionally swirling pan and brushing down sides of pan with a wet pastry brush, until thermometer registers 238°, 6-8 minutes. Remove pan from heat.
  • Meanwhile, beat whites in mixer until soft peaks form. Beat in salt.
  • Slowly pour hot sugar syrup down side of bowl into whites and beat until meringue is firm and glossy.
  • Continue beating until cool, about 4 minutes.
  • Baked Pie Crust (dairy free)
    My Aunt Judy once taught me that vinegar helps to make a pie crust light and flaky.  Trusting her tip, I never forgot it.  It only takes a bit of vinegar, you won't taste it, but when someone tells you how flaky the crust is you'll know the secret is the vinegar...not the butter as some might claim.


    Ingredients:
    • 2 cups flour
    • 1 teaspoon kosher salt
    • 1 cup vegetable shortening
    • 1/2 cup ice water
    • 1 1/2 teaspoon white vinegar
    Directions:
    • Combine flour and salt in bowl
    • Cut in chilled shortening into flour and salt mixture until coarse crumbs form, don't over mix
    • Stir in ice water (ice removed) and vinegar and mix until it forms a ball, dough will be sticky
    • Wrap dough in plastic wrap and pat into flat circle and chill 4 hours or overnight
    • Roll out dough on floured surface
    • Line pie plate with pie crust and prick with a fork
    • Chill pie crust in freezer or fridge for 1 hour
    • Line pie crust with foil and fill with ceramic pie weights or dried beans
    • Bake crust for 20 minutes in 350 oven, remove foil and pie weights and  bake another 12-17 minutes until crust is golden brown.
    • Cool crust
    To assemble pie
    • Spoon curd over crust
    • Spoon Blackberry's over curd
    • Spoon Meringue over curd and blackberry, allowing curd and blackberries to peak around the edge
    • Toast Meringue
    • Enjoy
      Tea Ceremony

      Friday, August 5, 2011

      Farmers Market Fresh Tomato Salsa


      Farmers Market Fresh Tomato Salsa

      Ingredients:
      • 5 Tomatoes, diced
      • 1 jalapeno, seeds removed, finely chopped
      • 2 tablespoons onion, finely chopped
      • 1 teaspoon fresh garlic, finely chopped
      • 2 tablespoons cilantro, finely chopped
      • 1 lime, juiced
      • 2 tablespoon poblano pepper
      • 1/2 teaspoon Salt
      • Fresh ground Pepper to taste
      • 1/2 teaspoon El Yucateco Habarnero Sauce


      Directions:
      • Chop ingredients as directed and combine everything in bowl,
      • Stir and serve with chips or tacos..or just eat with a spoon and pretend it is a salad
      • Happy summer everyone!!!

      Thursday, August 4, 2011

      Ro*Tel Tomato Nacho Cheese Dip


      My Mom used to make this dip when we would go on vacation to places like Quadna.  Erick loves Nacho Cheese dip so I decided to bring back the 70's with this old school rendition. It couldn't be easier and is a guilty pleasure.

      Ro*Tel Tomato Nacho Cheese Dip


      Ingredients:


      Directions:
      • Combine Ro*Tel Tomatoes, cubed Velveeta cheese and Habarnero Sauce
      • Microwave 7 minutes on 70% power, stir half way through
      • Put in jars and store in refrigerator
      • Dip tortilla chips in warm Ro*Tel Tomato Nacho Cheese Sauce


      Wednesday, August 3, 2011

      Cheesy Broccoli Canadian Bacon Egg Strata


      Years and years ago my Mom perfected the egg dish.  Ever since she has made several variations.  This is a play on one of Mom's.  Her secret is low and slow.  Egg dish should be cooked for a long time over low heat.  This gives you the lightest and most tender results.  I made this egg dish for when our friends Mickey and Susan came over for brunch.  They thrilled us when they brought their baby pug, Big Shug (AKA Sugar Bear).  Shug is so cute and I just wanted to hug and hold him.  Elizabeth and Dena stopped by that afternoon too.  Elizabeth fell in love with Shug and I think he had a bit of a crush on her too.   


      Ingredients:
      • 1 (16 ounce after crusts are removed) French baguette, cubed or 12 slices bread crust removed, or Sourdough Bread Crust removed...use a combination of all or whatever you have on hand
      • 8 ounces Canadian bacon, diced
      • 2 cups shredded Monterey Jack cheese, grated
      • 1 cup Parmesan cheese, grated
      • 2 cups Cheddar cheese, grated
      • 6 large eggs, beaten
      • 1 quart milk
      • 1 tablespoon Dijon mustard or spicy Brown Mustard
      • 10 ounce chopped broccoli
      • 1/3 cup onion, diced
      • 1/2 teaspoon salt
      • 1/8 teaspoon white pepper
      • 1/4 cup parsley, chopped
      • 3 tablespoons butter
      Directions:
      • Butter 9x13 pan
      • Saute onion in melted butter until translucent, about 10 minutes on medium low heat, set aside
      • Spread half of bread cubes on bottom of buttered baking dish. 
      • Layer half of the Canadian bacon, broccoli, onion and cheese over bread. 
      • Spread remaining half of bread cubes over mixture and top with remaining Canadian bacon, broccoli, onion and cheese
      • In mixing bowl, whisk together eggs, milk, mustard, salt, white pepper and parsley. 
      • Pour egg mixture over bread and cheese mixture
      • Cover and refrigerate overnight.
      • Preheat oven to 325 F.
      • Cover with foil and bake 60 minutes, remove foil and bake uncovered 30 more minutes until puffy and golden, or until knife inserted in center comes out clean.